

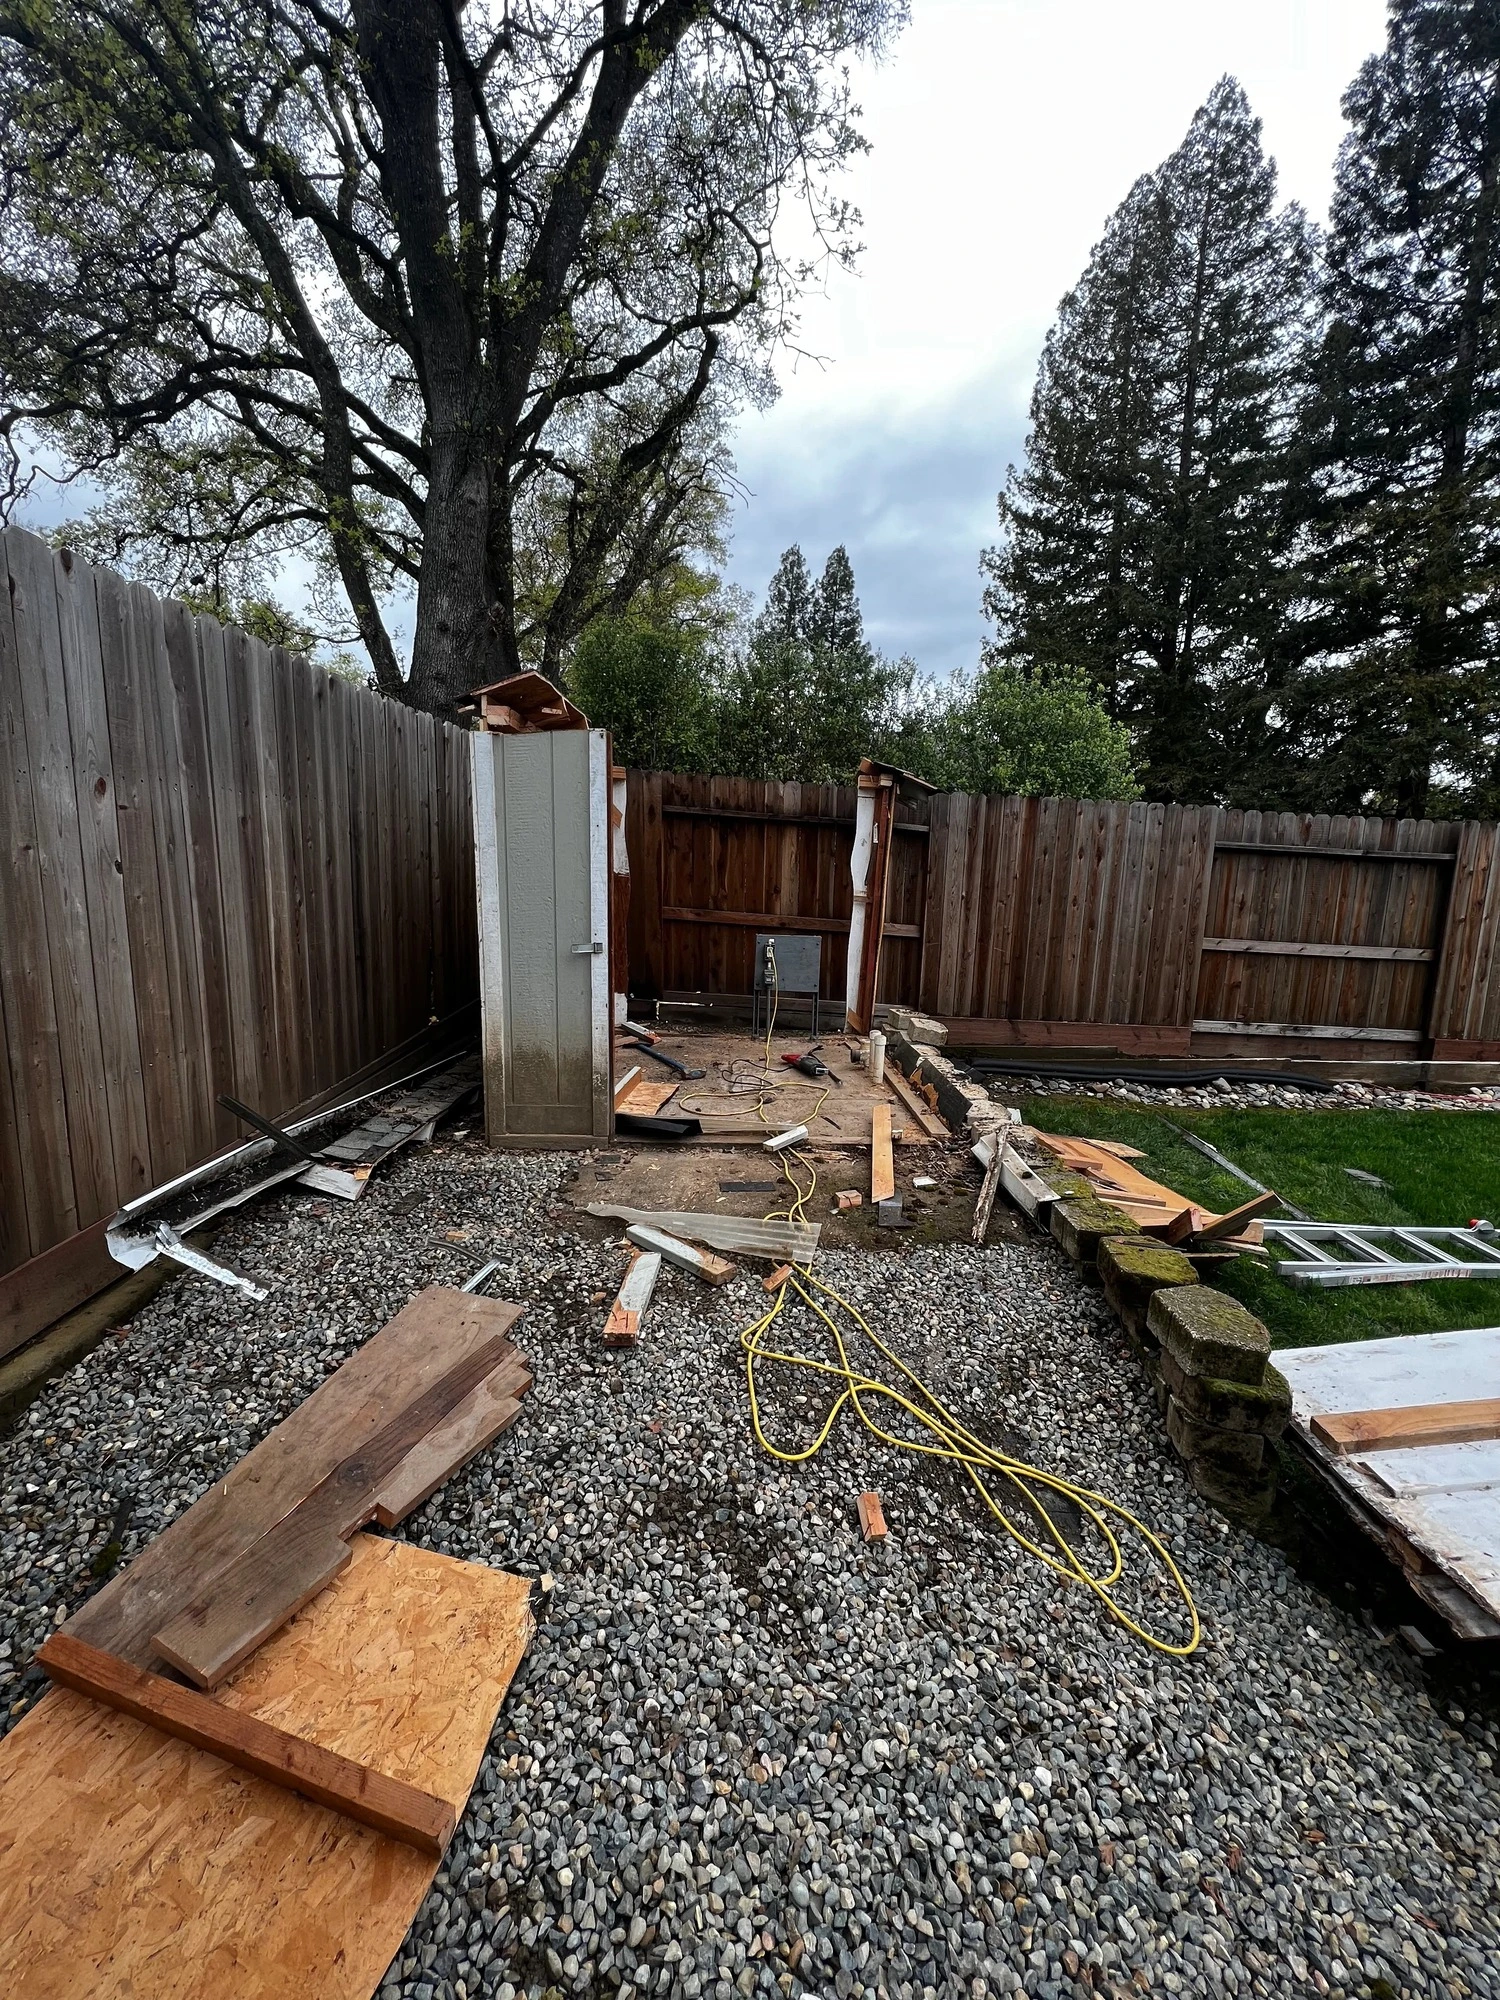
That old shed in the backyard has seen better days. Once a useful space for storing lawn equipment and gardening tools, it now leans precariously, its paint peeling and doors hanging off the hinges. An old, dilapidated shed is more than just an eyesore; it can be a safety hazard, a haven for pests, and a waste of valuable yard space. Tearing it down is a common home improvement project that can reclaim your backyard, but it’s a job that demands careful planning and respect for safety.
Removing a shed is a significant undertaking that involves demolition, heavy lifting, and navigating waste disposal regulations. It’s not as simple as knocking it down and leaving the pieces on the curb. You need the right tools, a solid plan, and a clear understanding of how to handle the mountain of debris you’re about to create.
This comprehensive guide will walk you through every step of how to remove an old shed safely and efficiently. We’ll cover crucial safety precautions, the necessary tools for the job, and detailed dismantling instructions for wood, metal, and plastic sheds. We’ll also explore your disposal options and explain why calling in a professional junk removal service like Take Care Junk is often the smartest, safest, and most stress-free solution for homeowners.
Phase 1: Planning and Preparation
Success in any demolition project begins long before you pick up a hammer. Thorough preparation is the key to a safe and efficient shed removal. Rushing this stage can lead to injuries, property damage, or unexpected complications that turn a weekend project into a month-long headache.
Safety First: Essential Precautions and Gear
Demolishing a structure, even a small one like a shed, is inherently dangerous. You’ll be dealing with heavy materials, sharp objects, and potential structural instability. Prioritizing safety is non-negotiable.
Essential Personal Protective Equipment (PPE):
- Steel-Toed Boots: Protect your feet from falling debris, sharp nails, and heavy framing members.
- Heavy-Duty Work Gloves: Leather or reinforced gloves are crucial for protecting your hands from splinters, rusty screws, and sharp metal edges.
- Safety Glasses or Goggles: Shield your eyes from flying dust, wood chips, and debris that will inevitably be dislodged.
- Dust Mask or Respirator: Old sheds can harbor mold, mildew, animal droppings, and dust. A good mask is essential for protecting your respiratory health.
- Hard Hat: If the shed has a tall or particularly unstable roof, a hard hat can protect you from falling objects.
- Long-Sleeved Shirt and Sturdy Pants: Protect your skin from cuts, scrapes, and irritation.
Crucial Safety Checks:
- Check for Utilities: Before you start any demolition or digging, you must check for utilities. Sheds, especially those with lighting or outlets, will have electrical lines running to them. Turn off the power at the breaker box and use a voltage tester to confirm the wires are dead. If you are unsure, hire a qualified electrician. Similarly, check for any water or gas lines that may run near or under the shed.
- Inspect for Pests: Old sheds are prime real estate for wasps, hornets, rodents, and other pests. Before you begin, carefully inspect the eaves, corners, and interior for nests or signs of infestation. Deal with any pest problems before you start tearing things apart.
- Work with a Partner: Shed demolition is not a solo job. A partner can help you safely handle large, heavy sections like walls and roof panels, stabilize parts of the structure as you work, and provide immediate help in case of an accident.
- Clear the Area: Remove everything from around the shed to create a safe work zone. This includes garden gnomes, planters, patio furniture, and toys. Create a clear perimeter of at least 10 feet around the structure.
Gathering the Right Tools
Having the right tools will make the job infinitely easier and safer. The specific tools may vary slightly depending on the shed material, but this list covers the essentials for most projects.
- Ladders: You will need at least one sturdy step ladder and possibly an extension ladder to safely access the roof.
- Pry Bars and Crowbars: Essential for prying apart wood panels, removing trim, and pulling nails.
- Sledgehammer: Useful for persuading stubborn framing and breaking up concrete slab foundations.
- Reciprocating Saw (Sawzall) with Demolition Blades: This is arguably the most valuable tool for shed demolition. It can quickly cut through nails, screws, wood, and metal.
- Drill/Impact Driver: For efficiently removing screws and bolts, especially in metal and plastic sheds.
- Hammer: A standard claw hammer for pulling nails and general use.
- Wrenches and Socket Set: Necessary for removing nuts and bolts on metal shed frames.
- Shovel and Mattock: For digging around the foundation or posts if the shed is anchored to the ground.
- Wheelbarrow: For moving debris from the demolition site to your disposal pile.
Site Preparation
Before the demolition begins, take a few final steps to prepare the site.
- Empty the Shed: Remove every single item from inside the shed. This is a great opportunity to sort through your belongings and decide what to keep, donate, or throw away.
- Remove Doors and Windows: It’s much safer to take out doors and windows before you start tearing down the walls. This prevents the danger of shattering glass. Simply unscrew the hinges and carefully lift them out.
- Plan Your Debris Pile: Designate a specific spot in your yard or driveway for the debris. Choose a location that is accessible for a truck or dumpster but out of the way of daily traffic.
Phase 2: The Demolition Process (Step-by-Step)
The best way to demolish a shed is to deconstruct it in the reverse order it was built. This systematic approach is safer and more controlled than just knocking it over. The process varies based on the shed’s construction material.
How to Dismantle a Wooden Shed
Wood sheds are the most common type and are typically built like a miniature house with a frame, siding, and a roof.
Step 1: Tear Off the Roof
The roof is the first major component to go. Working from the top down is the safest method.
- Remove Shingles: Use a shovel or pitchfork to scrape and pry off the asphalt shingles or other roofing material. Let them fall to the ground inside or outside the shed.
- Pry Up the Sheathing: The shingles are attached to a layer of plywood or OSB sheathing. Use a pry bar to lift the edges of the sheathing and peel it off the roof rafters.
- Cut the Rafters (Optional): If the roof structure is difficult to disassemble piece by piece, you can use a reciprocating saw to cut the rafters where they meet the walls. Have your partner help you carefully lower the cut sections to the ground. Check out our guide on roofing debris removal and how they are disposed of responsibly.
Step 2: Take Down the Walls
With the roof gone, the walls are exposed and ready for removal.
- Start with the Siding: Use a pry bar to remove the exterior siding panels.
- Deconstruct the Wall Frames: A wood shed’s walls are made of 2×4 studs. The easiest way to take them down is one wall at a time. Go to a corner and use a sledgehammer to knock the top plate of one wall away from the adjoining wall.
- Use Gravity: Once a corner is separated, you can often push the entire wall section over, either into the shed’s interior or outward into your clear zone. Ensure everyone is standing clear before you push.
- Break Down the Walls: Once a wall section is on the ground, you can break it down further with a sledgehammer or use a reciprocating saw to cut it into smaller, more manageable pieces.
Step 3: Address the Floor and Foundation
- Pry Up the Floorboards: Use a pry bar to remove the plywood or plank flooring from the floor joists.
- Deconstruct the Floor Frame: The floor joists can be pried apart or cut with a saw.
- Deal with the Foundation: The shed might be sitting on simple skids (large wooden beams), concrete blocks, or a solid concrete slab.
- Skids/Blocks: These can simply be moved out of the way.
- Concrete Slab: You have two choices: leave it in place to be repurposed as a patio base, or break it up. Breaking up a concrete slab is intense work requiring a sledgehammer or a rented jackhammer.
How to Dismantle a Metal Shed
Metal sheds are essentially a collection of panels bolted to a frame. Disassembly is often more tedious than difficult, involving the removal of hundreds of screws and bolts.
Step 1: Disassemble the Doors and Roof
- Remove the Doors: Unbolt the hinges and any sliding tracks.
- Unbolt the Roof Panels: Using a drill with the correct bit or a socket wrench, start removing the screws or bolts holding the roof panels in place. Begin at the peak and work your way down. Metal panels can have sharp edges, so handle them with care.
- Dismantle the Roof Frame: Once the panels are off, unbolt the trusses and beams that form the roof structure.
Step 2: Remove the Wall Panels
This is the most time-consuming part. Systematically work your way around the shed, removing all the screws that attach the wall panels to the frame and to each other. As you remove panels, stack them neatly to avoid creating a tripping hazard.
Step 3: Take Apart the Frame
With all the panels gone, you are left with the metal skeleton. Use your drill or wrenches to unbolt the frame components. The frame will likely come apart in vertical and horizontal sections.
Step 4: Remove Anchors
Metal sheds are usually anchored to the ground or a concrete slab with bolts or stakes. Remove these to completely free the structure.
How to Dismantle a Plastic (Resin) Shed
Plastic sheds are the easiest to disassemble. They are designed for homeowner assembly and usually feature a system of interlocking panels, clips, and a minimal number of screws.
- Consult the Manual: If you still have the original assembly manual, it will be your best guide for disassembly. Simply follow the steps in reverse.
- Start from the Top: As with other sheds, begin with the roof. Look for screws or clips holding the roof panels in place.
- Pop Panels Apart: The walls are typically interlocking panels. Once any retaining screws are removed, you can often use a pry bar or even just firm pressure to pop the panels apart at the seams.
- Lift Walls from the Floor: The wall panels often sit in a channel built into the floor piece. Once they are separated from each other, you can lift them out of the floor base.
- The Floor: The floor itself is usually a single large piece of molded plastic that can be carried away once the walls are gone.
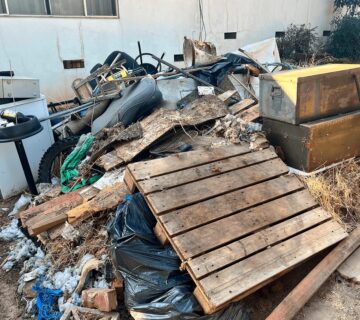
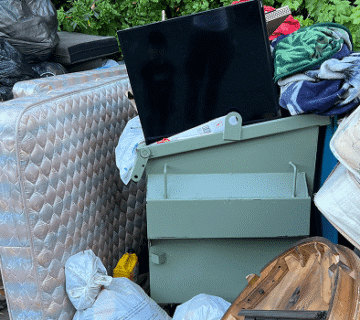
Phase 3: Debris Disposal Options
Once the shed is in a pile on the ground, the real clean-up begins. You will have a significant amount of wood, metal, plastic, shingles, and potentially broken concrete to deal with.
Option 1: DIY Hauling to a Landfill or Transfer Station
If you own a pickup truck or a large trailer, you can haul the debris yourself.
- Pros: It can be a cost-effective choice if you already have the vehicle and are willing to do the labor.
- Cons: This is incredibly labor-intensive. You have to load tons of heavy, dirty, and sharp debris, make potentially multiple trips, pay fees at the disposal site (which can be expensive), and spend a significant amount of your time on logistics.
Option 2: Renting a Roll-Off Dumpster
You can rent a large dumpster, have it delivered to your property, and fill it yourself.
- Pros: Convenient for large jobs, allowing you to work at your own pace.
- Cons: You still have to do all the heavy lifting. Dumpsters can be expensive, take up a lot of space, and may require a city permit. You pay for the whole dumpster, even if your debris only fills half of it.
Option 3: Recycling, Repurposing, and Donating
This is the most environmentally friendly approach.
- Wood: Untreated wood can be repurposed for DIY projects or firewood. Clean, nail-free wood might be accepted by local wood recyclers to be chipped into mulch. However, pressure-treated or painted wood often must go to the landfill.
- Metal: Metal panels and frames are highly valuable. You can take them to a local scrap metal dealer who will likely pay you for them. This is a great way to offset some of your project costs.
- Plastic: Some plastic sheds may be recyclable, but you will need to check with your local recycling facility to see if they accept that type of large-format rigid plastic.
- Donation: If the shed is still in usable condition, you might be able to offer it for free on a local marketplace, provided the person who wants it is willing to come and dismantle it themselves.
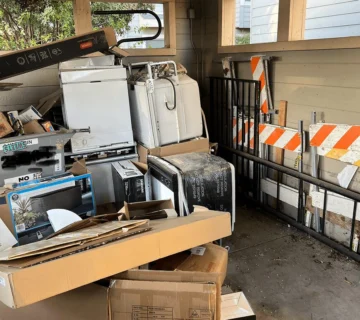
Option 4: Hiring a Professional Junk Removal Service
For most people, this is the best option. A professional junk removal company provides a full-service solution that eliminates all the hassle and hard work of disposal.
- Pros:
- Effortless: The service is completely hands-off for you. A team arrives, does all the heavy lifting, loads the debris, and hauls it away.
- Safe: You avoid the significant risk of injury associated with moving heavy, sharp, and awkward materials.
- Efficient: A professional crew can clear a site in a fraction of the time it would take to do it yourself.
- Responsible Disposal: A reputable company like Take Care Junk is committed to eco-friendly disposal. We know exactly where to take different materials to ensure they are recycled whenever possible. If you want local, hands-on help, reach out through our contact page.
The Smartest Solution: Choose Take Care Junk
The satisfaction of tearing down an old shed can quickly fade when you’re staring at a mountain of debris. This is where Take Care Junk comes in. We specialize in making the final step of your project the easiest one. We offer full-service shed removal and demolition services throughout the greater Sacramento area.
Why handle the back-breaking labor and logistical nightmare of disposal yourself? Our professional, uniformed team can handle the entire job for you, from demolition to final sweep-up. We have the right tools, the right safety equipment, and the right experience to take down your shed quickly and safely. We then load every last piece onto our truck and ensure your yard is left clean and ready for its next chapter.
We are deeply committed to protecting our local environment. We don’t just take your shed debris to the dump. We carefully sort all the materials we collect. Metal is sent to a scrap recycler. Clean wood is directed to the proper wood recycling facilities. We go the extra mile to divert as much waste as possible from our local landfills.
We provide shed removal throughout Sacramento and surrounding areas, helping homeowners safely clear old backyard structures without the heavy lifting.
Your time and safety are valuable. Instead of spending your weekend wrestling with rusty nails and heavy debris, let us handle the hard work. With Take Care Junk, you can be confident that your old shed will be gone without you having to lift a finger, and the waste will be handled in the most responsible way possible.
Ready to reclaim your backyard? Contact us today for a free, no-obligation quote on our shed removal services!