

The decision to declutter your home often starts with a single thought: “I have too much stuff.” This realization can be followed by a wave of overwhelm. Where do you begin when years of accumulated belongings are staring back at you from every corner, closet, and countertop? It feels like an insurmountable task, destined to be put off for another day, another week, another year. But what if you could transform your entire living spac e in just one month?
Welcome to the 30-Day Home Declutter Challenge. This is not about achieving perfection; it’s about making tangible progress. We’ve designed a structured, day-by-day plan to guide you through your home, breaking down the monumental task of decluttering into small, manageable bites. Over the next 30 days, you will tackle specific areas, make decisive choices, and reclaim your space from the grip of clutter. At the end, you’ll be left with a home that feels lighter, more organized, and more peaceful. And for the items that don’t make the cut, handling the final removal step is often the most time-consuming part of the process.
Preparing for a Successful Decluttering Journey
Before we dive into Day 1, a little preparation will set you up for success. Taking the time to get organized first will prevent you from feeling discouraged and help you maintain momentum throughout the month.
The Mindset Shift: From Overwhelm to Action
The biggest hurdle in any decluttering project is mental. It’s easy to feel attached to items, guilty about getting rid of things you spent money on, or simply paralyzed by the sheer volume. The goal of this challenge is to shift your mindset.
- Focus on Progress, Not Perfection: You won’t create a minimalist utopia in 30 days. The goal is to make significant, noticeable improvements.
- Embrace Decisiveness: Use the “touch it once” rule. When you pick up an item, decide its fate immediately rather than putting it down to think about later.
- Let Go of Guilt: An item’s cost is a sunk cost. If it is no longer serving you, keeping it out of guilt only adds to your clutter. Give it a chance to be useful to someone else.
Your Decluttering Toolkit: The Four-Box Method
To keep the process efficient, gather your supplies. The most effective strategy is the Four-Box (or Four-Bin) Method. For every area you tackle, you will sort items into one of four categories:
- Keep: These are items you actively use, truly love, or are legally required to keep. They have a designated place in your home and your life.
- Donate: Items that are in good, usable condition but no longer fit your lifestyle, taste, or needs. These can bring value to others.
- Sell: You might have items with significant monetary value that are worth the effort of selling. Be realistic about the time this takes. If an item has been sitting in a “to-sell” pile for months, it might be time to move it to the donate pile.
- Junk/Dispose: This category is for everything else—broken items, expired products, worn-out clothing, old papers, and anything that cannot be donated or sold. This is the pile that often causes the most logistical headaches, which is why a professional junk hauling service is so valuable.
Set up these four boxes or designated areas before you begin each day’s task. This simple system turns a chaotic mess into an organized process.
The 30-Day Challenge: A Day-by-Day Guide
Ready to begin? Each day has a specific focus. Some tasks will take 15 minutes, others might take an hour. The key is to complete the day’s task and feel the satisfaction of progress.
Week 1: Building Momentum with High-Impact Areas
The first week is designed to deliver quick wins. We’ll focus on areas that create visual clutter and have a big impact on your daily life once they are cleared.
- Day 1: The Kitchen Counter. Your first task is simple but powerful. Clear everything off your kitchen countertops except for 2-3 essential daily-use items (like a coffee maker or toaster). Put everything else away in cabinets or drawers. If it doesn’t have a home, place it in one of your four boxes.
- Day 2: The Junk Drawer. Every home has one. Empty it completely. Wipe it clean. Only put back the items that are absolutely essential and belong there. Be ruthless.
- Day 3: The Refrigerator and Freezer. Go through everything. Toss expired food and condiments. Wipe down all shelves and drawers. Consolidate items and create a clean, organized space. Don’t forget to clear the magnets and papers off the door.
- Day 4: The Pantry. Pull everything out. Dispose of expired foods, stale snacks, and spices you haven’t used in years. Group like items together and put them back in an organized way.
- Day 5: The Entryway/Mudroom. This is the first impression of your home. Clear out shoes, jackets, and bags that don’t belong. Create a system where every item has a specific spot. The goal is a clear, welcoming path into your home.
- Day 6: The Coffee Table and End Tables. These surfaces are clutter magnets. Remove everything—magazines, remote controls, old mail, and random trinkets. Style the table with just a few intentional items, like a plant or a couple of books.
- Day 7: The Medicine Cabinet. Empty the contents. Safely dispose of expired medications and old cosmetics. Wipe down the shelves and only put back what you currently use. Clearing these small, overlooked spaces builds strong momentum early in the process.
Week 2: Conquering Closets and Paper Clutter
Now that you’ve built some momentum, it’s time to tackle some of the more challenging areas: our clothes and the endless piles of paper.
- Day 8: Your Sock and Underwear Drawer. A quick and satisfying task. Get rid of anything with holes, stains, or worn-out elastic.
- Day 9: Your T-Shirts and Casual Tops. Go through your shirts. If you haven’t worn it in a year, it’s time for it to go. Be honest with yourself.
- Day 10: Pants and Bottoms. Try on jeans and pants you’re unsure about. If they don’t fit or you don’t feel good in them, add them to the donate pile.
- Day 11: Dresses and Formal Wear. We often hold onto these for “someday.” If “someday” hasn’t come in several years, it may be time to let someone else enjoy them.
- Day 12: Outerwear. Go through your coat closet. How many jackets do you really need? Pack away seasonal items, and donate any duplicates or ill-fitting coats.
- Day 13: Shoes. Gather all of your shoes in one place. This can be an eye-opening experience. Get rid of anything that is uncomfortable, worn out, or out of style.
- Day 14: Mail and Paper Piles. This is a big one. Grab that pile of mail that’s been sitting on the counter. Sort it immediately: file, shred, or take action. Your goal is to get to a “paper inbox zero.”
Week 3: Deep Dives into Living and Personal Spaces
This week, we move into bedrooms, bathrooms, and living areas. These spaces are deeply personal, and clearing them can have a profound impact on your sense of well-being.
- Day 15: Bedroom Nightstands. Clear the surfaces and go through the drawers. These should be havens for rest, not storage for clutter. Keep only essentials like a lamp, a book, and an alarm clock.
- Day 16: Dresser Tops and Surfaces. Just like the nightstands, these surfaces should be clear. Remove trinkets, old perfume bottles, and accumulated clutter.
- Day 17: Under the Bed. This is not a long-term storage solution. Pull everything out. Find proper homes for items or decide to donate/dispose of them. Enjoy the feeling of clear space under your bed.
- Day 18: Books and Magazines. Books can be tough. Keep the ones you truly love or reference often. Donate the rest to a library, school, or thrift store. Recycle old magazines. Many local libraries, schools, and community programs accept book donations.
- Day 19: DVDs, CDs, and Old Media. In our digital world, physical media often just collects dust. Consider digitizing what you want to keep and letting go of the physical copies. Removing old media towers can free up a surprising amount of space, a common result when clearing out unused media collections.
- Day 20: Bathroom Cabinets and Drawers. Go through all your toiletries, makeup, and hair products. Get rid of expired items, products you tried and didn’t like, and the collection of tiny hotel bottles.
- Day 21: Linen Closet. Pull everything out. Match up sheet sets. Get rid of any stained, ripped, or frayed towels and linens. Fold what you’re keeping neatly to maximize space.
Week 4: Tackling the Toughest and Most Overlooked Areas
The final stretch! This week is dedicated to the spaces we often dread the most: storage areas and sentimental items. You’ve built up your decluttering muscles, and you’re ready for this.
- Day 22: Home Office Desk and Files. Clear your desk surface. Go through your filing cabinet and shred old documents you no longer need. Organize important papers into clearly labeled files.
- Day 23: Children’s Toys. If you have kids, involve them in this process. Have them help you sort through toys they’ve outgrown. Set limits on how many can be kept. This is a constant battle, but a major purge can reset the playroom.
- Day 24: Sentimental Items. This is perhaps the most emotionally difficult task. Set a timer for one hour. Go through one box of sentimental items. The goal isn’t to get rid of everything, but to curate your collection. Keep the most meaningful items and consider taking photos of the rest before letting them go.
- Day 25: The Laundry Room/Area. Clear surfaces, get rid of single socks that have been mateless for months, and dispose of old cleaning products.
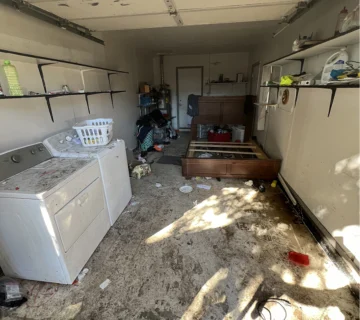
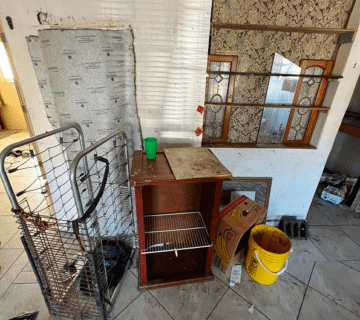
- Day 26: The Garage – Zone 1. Do not try to tackle the whole garage in one day. Break it into zones. Today, focus on one section, like the tool bench or gardening supplies.
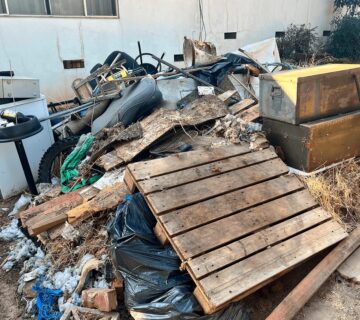
- Day 27: The Garage – Zone 2. Continue with another section. This could be sports equipment, holiday decorations, or stored furniture. It’s in the garage where the “Junk” pile often grows largest, with anything from old tires to broken lawn equipment.
- Day 28: The Attic or Basement. Choose one of these major storage areas. Again, work in zones if you need to. Be prepared to make some tough decisions about items you’ve been storing for years “just in case.”
The Final Push: Disposal and Celebration
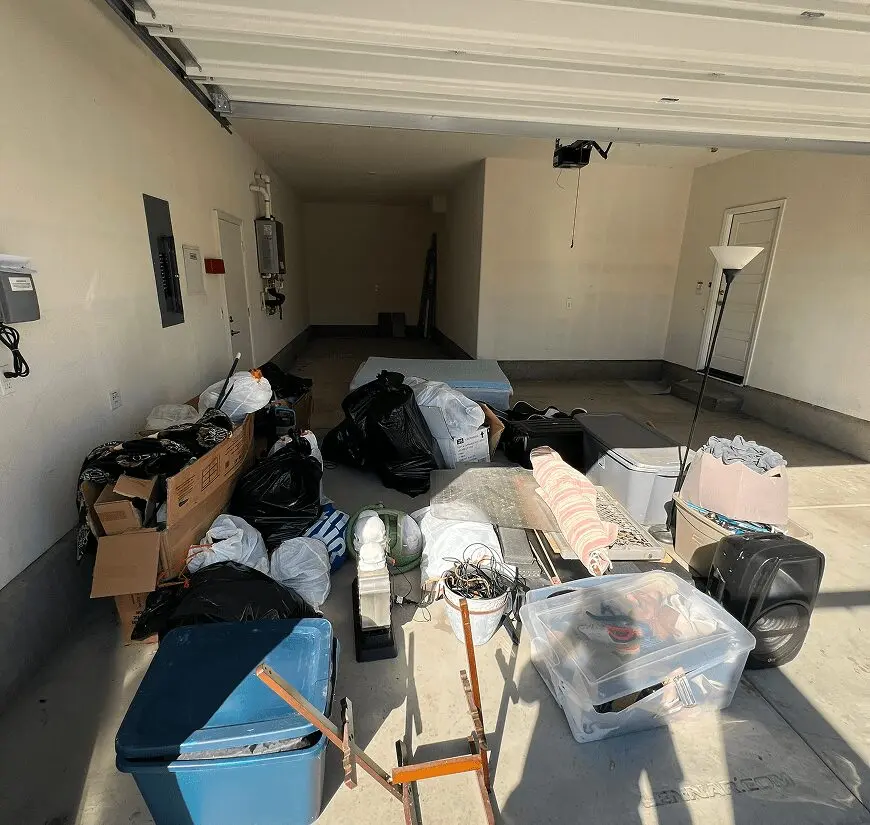
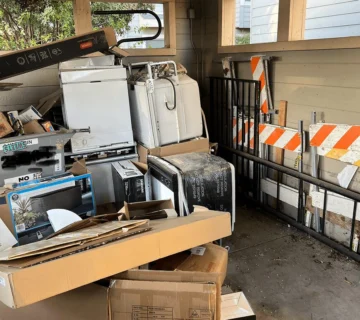
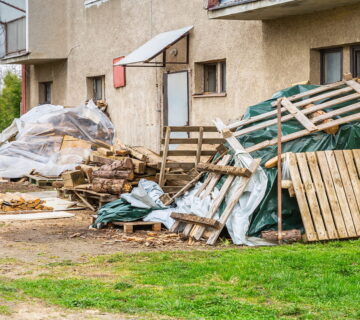
- Day 29: Final Junk Pile Consolidation. You’ve made it! Gather all the items from your “Junk/Dispose” pile into one accessible location, like your driveway or garage. Seeing it all in one place will feel incredible. You’ll see just how much space you’ve reclaimed.
- Day 30: Professional Junk Removal. This is the final step. Instead of making multiple trips to disposal sites or trying to coordinate different drop-offs, handling everything in one removal clears the remaining items quickly and allows you to complete the process without unnecessary delays.
The Secret Weapon: Professional Junk Removal
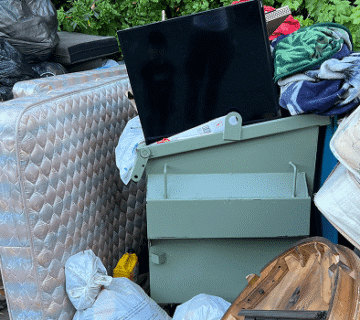
Throughout this challenge, you will inevitably create a substantial pile of items that need to be disposed of. This can include old furniture, broken electronics, bags of miscellaneous household junk, and yard waste. The final stage of decluttering usually involves removing items that cannot be donated or reused. This can include furniture, electronics, and general household debris that is difficult to transport or dispose of properly. Coordinating removal, sorting, and disposal often takes more time and effort than expected, especially when dealing with larger or heavier items. Handling everything in a single pickup simplifies the process and allows you to complete the project without additional delays.
Completing the 30-Day Home Declutter Challenge is a major accomplishment. It creates a more functional and peaceful living environment and simplifies your life. By following this day-by-day guide, you can systematically work through your home without the usual overwhelm. Handling the final removal step efficiently allows you to complete the process without adding extra time or effort at the end.
Are you ready to take the challenge and reclaim your home? Start today, and in 30 days, you’ll be amazed at what you can achieve. When you’re ready for the final cleanout, contact Take Care Junk for a free estimate and let us help you cross the finish line.