


A fence can define a property, providing privacy, security, and curb appeal. But when it starts to lean, rot, or rust, it becomes more of a liability than an asset. Replacing an old, dilapidated fence is a rewarding home improvement project, but it leaves you with a significant challenge: what do you do with all that old material? Disposing of an old fence isn’t as simple as leaving it on the curb. It requires careful dismantling, sorting, and adherence to local disposal regulations.
Navigating the complexities of waste management, especially for bulky items like fencing, can be overwhelming. This comprehensive guide will walk you through everything you need to know about how to dispose of old fencing responsibly. We will cover the step-by-step process for dismantling different types of fences, explore various disposal options from recycling to landfilling, and explain why hiring a professional junk removal service might be your best solution. Whether you’re a DIY enthusiast or planning to hire contractors, understanding the process will ensure your project is completed smoothly and safely.
Preparing for Fence Removal
Before you grab a sledgehammer and start swinging, a little preparation goes a long way. Proper planning ensures a safer, more efficient fence removal process and makes disposal much easier. Rushing this stage can lead to personal injury, property damage, or a much bigger cleanup job than you anticipated.
Safety First: Essential Gear and Precautions
Dismantling a fence involves dealing with sharp edges, rusty nails, heavy materials, and unpredictable structural collapses. Protecting yourself is the top priority. Before you begin, gather the following essential safety gear:
- Heavy-Duty Gloves: Protect your hands from splinters, sharp metal edges, and rusty nails. Leather or reinforced work gloves are ideal.
- Safety Glasses or Goggles: Shield your eyes from flying debris, dust, and small particles that can be dislodged during demolition.
- Long-Sleeved Shirt and Pants: Cover your arms and legs to prevent cuts, scrapes, and skin irritation from treated wood or other materials.
- Steel-Toed Boots: Protect your feet from falling fence posts, panels, and tools. A sturdy, closed-toe boot is the minimum requirement.
- Dust Mask: A mask is especially important when dealing with old, treated wood, which may contain chemicals, or when cutting materials that create fine dust.
Beyond personal protective equipment (PPE), take these precautions:
- Clear the Area: Remove any obstacles from both sides of the fence line, including garden furniture, planters, toys, and decorations.
- Check for Utilities: Before you dig up any fence posts, call 811, the national “call before you dig” hotline. This free service will have local utility companies come out and mark the location of underground lines for gas, water, electricity, and communications. Accidentally hitting a utility line is dangerous and can result in costly repairs.
- Work with a Partner: Fence removal is not a one-person job. A partner can help you safely handle heavy panels, stabilize sections as you work, and provide assistance in case of an accident.
Necessary Tools for Dismantling
The right tools will make the job faster and safer. The specific tools you need will depend on your fence type, but this general list covers most situations:
- Pry Bar and Crowbar: Essential for prying apart wood panels and pulling out nails.
- Drill or Impact Driver: For removing screws and bolts quickly, especially in vinyl or metal fences.
- Reciprocating Saw (Sawzall): Invaluable for cutting through stubborn nails, bolts, and even the fence posts themselves if they are difficult to remove.
- Sledgehammer: Useful for breaking apart concrete footings and persuading stubborn posts.
- Shovel and Post Hole Digger: For excavating the dirt around fence posts.
- Bolt Cutters: A must-have for cutting through chain link or wire fencing.
- Wrenches and Sockets: For loosening nuts and bolts on metal or vinyl fence hardware.
Having these tools organized and ready will streamline the dismantling process and prevent frustrating interruptions.
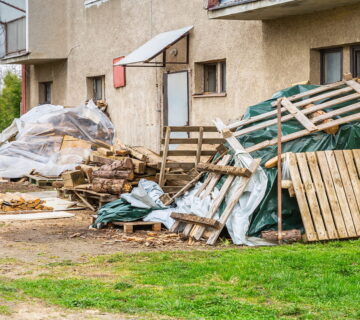
Dismantling Your Fence: A Step-by-Step Guide
The method for taking down a fence varies significantly depending on the material it’s made from. Below are detailed instructions for the three most common types of residential fencing: wood, vinyl, and chain link.
How to Take Down a Wood Fence
Wood fences are the most common type, and they often come apart in a predictable sequence: panels, rails, and then posts.
- Remove the Panels or Pickets:
Start by detaching the vertical boards (pickets) or pre-built panels from the horizontal rails.
- For Individual Pickets: Use a pry bar to carefully loosen each picket from the rails. Work from one end to the other. Be mindful of nails; as you remove pickets, either pull the nails out completely or hammer them flat to prevent injury.
- For Panels: If your fence is constructed with pre-made panels, they are typically screwed or nailed to the posts. Use a drill to remove screws or a pry bar to carefully detach the panels from the posts. These can be heavy, so have your partner help you support and lower them safely.
- Detach the Horizontal Rails:
Once the pickets or panels are gone, you are left with a skeleton of posts and rails. The rails are attached to the posts with nails, screws, or brackets.
- Use a drill to remove screws.
- Use a pry bar or the claw end of a hammer to pry nailed rails off the posts. If nails are stubborn, a reciprocating saw can be used to cut through them.
- Remove the Fence Posts:
This is often the most physically demanding part of the job. Most fence posts are set in a concrete footing several feet deep.
- Dig Around the Post: Use a shovel to dig out the dirt around the concrete footing. You’ll need to clear a few feet in diameter to get leverage.
- Wiggle and Pry: Once the top of the footing is exposed, work with your partner to rock the post back and forth. This can help loosen it from the surrounding soil. You can use a long pry bar or a 4×4 piece of wood as a lever against a block to help lift the footing out of the ground.
- Break the Concrete (If Necessary): If the footing is too large to lift, you may need to break it up with a sledgehammer. Always wear safety glasses when doing this.
- Cut the Post: As a last resort, you can use a reciprocating saw to cut the post off at ground level. This leaves the concrete and a stump of wood in the ground, which may not be ideal if you plan to build a new fence in the same spot.
How to Take Down a Vinyl (PVC) Fence
Vinyl fences are modular and often easier to disassemble than wood fences. They are designed to fit together with a system of tabs, slots, and screws.
- Detach the Panels:
Vinyl panels typically slide into channels on the posts and are secured with a screw or tab at the bottom rail.
- Locate and remove the screws holding the bottom rail of each panel in place.
- Lift the panel straight up to slide it out of the channels in the posts. This may require some force if dirt and debris have settled in the channels.
- Remove the Rails:
If your fence is not panelized, you will need to remove the individual rails.
- Rails are often “snapped” into brackets on the posts. Look for locking tabs that can be depressed to release the rail.
- Carefully disengage the rails from the post brackets, working one section at a time.
- Remove the Vinyl Posts:
Vinyl posts are usually sleeves that fit over a wooden or metal post inside.
- If there is an internal support post, you will first need to remove the vinyl sleeve. This can often be done by removing a few set screws and sliding the sleeve up and off the support post.
- Once the sleeve is off, you can follow the instructions for removing a wood or metal post, depending on what was used for support. If the post is only vinyl set in concrete, the process is the same as for a wood post: dig, wiggle, and lift.
How to Take Down a Chain Link Fence
Chain link fences are held together by tension. Releasing that tension is the key to taking them apart safely.
- Untie the Mesh from the Posts:
Start by removing the wire or metal ties that hold the chain link mesh to the line posts (the intermediate posts between the main terminal posts). Use pliers to untwist and remove these ties. - Detach the Tension Bar:
At each end of a fence run, the mesh is attached to a terminal post (corner, end, or gate post) by a tension bar. This bar is held tight by tension bands bolted around the post.
- Use a wrench or socket to loosen the nuts on the tension band bolts.
- Once the bands are loose, you can slide the tension bar out of the chain link mesh. The mesh will immediately lose its tension.
- Roll Up the Mesh:
With the tension released, the chain link fabric is easy to handle.
- Lay the mesh on the ground and roll it up tightly, like a carpet. This makes it much more manageable for transport and disposal. A tightly rolled fence is safer and takes up less space.
- Remove the Top Rail and Posts:
- The top rail is typically a series of pipes that slide into one another and rest in brackets on top of the posts. Simply lift the rails out of their brackets.
- Finally, remove the posts. Chain link posts are almost always set in concrete footings. Follow the same procedure as for wood posts: dig around the footing, use leverage to wiggle and lift it out of the ground, or cut the post at ground level.
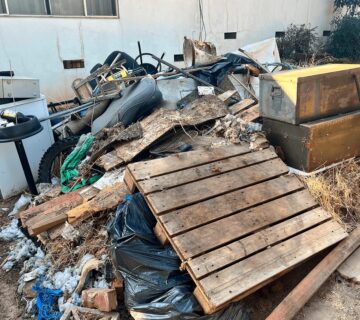
Legal and Responsible Disposal Options
Once your old fence is dismantled and stacked in a pile, the next step is getting rid of it. You can’t just leave it by the curb for regular trash pickup. Different materials require different disposal methods, and regulations vary by location.
Option 1: Renting a Dumpster
Renting a roll-off dumpster is a popular DIY option. A container is delivered to your property, you fill it with the fence debris at your own pace, and the company hauls it away when you’re done.
- Pros: Convenient for large amounts of debris. You can work on your own schedule.
- Cons: You have to do all the heavy lifting yourself. Dumpsters can be an eyesore and take up space in your driveway. You may need a permit from your city to place a dumpster on the street. Costs can be high depending on the size and rental period.
- Best for: Large fencing projects where you prefer to load the debris yourself over several days.
Option 2: Hauling to a Landfill or Transfer Station
Another DIY approach is to load the debris into your own truck or trailer and take it directly to a local landfill, recycling center, or transfer station.
- Pros: Can be the most cost-effective option if you have a suitable vehicle.
- Cons: Extremely labor-intensive. It requires loading heavy, awkward materials, securing the load for safe transport, driving to the facility, unloading, and paying disposal fees (often by weight). You may need to make multiple trips. Some facilities have specific requirements for how materials must be sorted.
- Best for: Small fences and individuals who own a truck and are comfortable with heavy physical labor. Before you go, check your local facility’s website for their hours, accepted materials, and fees.
Option 3: Recycling and Repurposing
Recycling is the most environmentally friendly option. Whether you can recycle your fence depends on the material and its condition.
- Wood Fencing:
- Untreated Wood: Untreated lumber (like cedar) can often be recycled into mulch or compost. Some local recycling centers accept clean wood.
- Treated Wood: Wood treated with chemicals like CCA (Chromated Copper Arsenate), common in older fences, is considered hazardous waste. It cannot be burned or turned into mulch. It must be taken to a landfill that is specifically licensed to handle this type of material.
- Repurposing: Untreated wood in good condition can be repurposed for countless DIY projects, such as building raised garden beds, creating rustic picture frames, or crafting outdoor furniture.
- Vinyl (PVC) Fencing:
- PVC is a type of plastic that is recyclable, but not all municipal recycling programs accept it. You may need to find a specialized recycling facility. Look for plastic recyclers in your area and call to confirm they accept PVC fencing.
- Metal Fencing (Chain Link, Aluminum):
- Metal is highly recyclable and valuable. Scrap metal yards will often pay you for your old chain link, aluminum, or steel fencing. You will need to haul it to their facility, but you can make a little money back from your project.
Option 4: Hiring a Professional Junk Removal Service
For many homeowners, the easiest and most efficient solution is to hire a professional junk removal company. A team comes to your property, does all the heavy lifting, loads the debris onto their truck, and hauls it away for proper disposal.
- Pros:
- Convenience: The service is fast and requires zero physical effort on your part. You just point to the pile, and it disappears.
- Safety: You avoid the risk of back strain, cuts, and other injuries associated with lifting and moving heavy, sharp debris.
- Proper Disposal: A reputable company like Take Care Junk knows exactly where to take different materials. We are committed to responsible disposal, ensuring that recyclable materials are sent to the correct facilities and that treated wood is handled according to regulations.
- Time Savings: The entire process can be completed in a fraction of the time it would take to do it yourself.
- Cons: The cost may be higher than a purely DIY approach, but it includes labor, transport, and disposal fees.
- Best for: Anyone who values their time and safety. It’s the perfect solution for homeowners who don’t have a truck, don’t want to do the heavy lifting, or want to ensure the debris is disposed of responsibly without having to research local regulations.
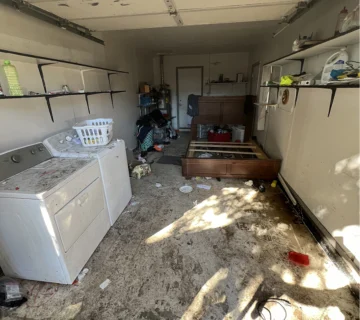
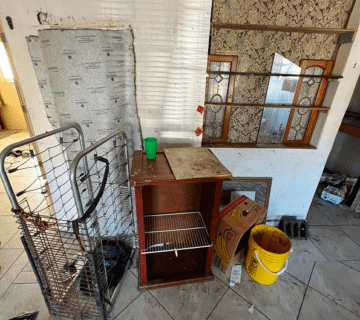
Professional junk removal helps homeowners clear old fencing quickly without dealing with multiple dump runs, disposal rules, or heavy lifting. Full-service hauling keeps the project simple and makes sure materials are handled responsibly.
Why Choose Take Care Junk for Your Fence Disposal?
When your fence project is done, you want the leftover mess gone quickly and efficiently. Take Care Junk offers a seamless solution for fence removal and disposal across the greater Sacramento area. We understand that your time is valuable, and your property deserves respect.
Our professional, uniformed team arrives ready to work. We handle all the loading and cleanup, so you don’t have to lift a finger. We have the experience and equipment to manage any size pile of fencing debris, from a small picket fence to a large commercial enclosure.
We are also deeply committed to the environment. We sort through all the debris we collect, diverting as much as possible away from landfills. We recycle wood, metal, and vinyl whenever possible, ensuring your old fence is handled in the most sustainable way.
Local Help for Fence Removal Projects
Take Care Junk helps homeowners across Sacramento and surrounding communities remove old fencing, damaged panels, broken gates, and full fence tear-outs without turning the cleanup into another major project. We handle the loading, hauling, and responsible disposal so the property is clean, safe, and ready for the next step.
Getting rid of an old fence is the final, crucial step in reclaiming your yard. While there are several ways to approach the task, hiring a professional service like Take Care Junk eliminates the hassle, physical strain, and logistical headaches. Let us handle the heavy lifting so you can focus on enjoying your newly improved space. Ready to clear out that old fence? Contact us today for a free, no-obligation estimate!