

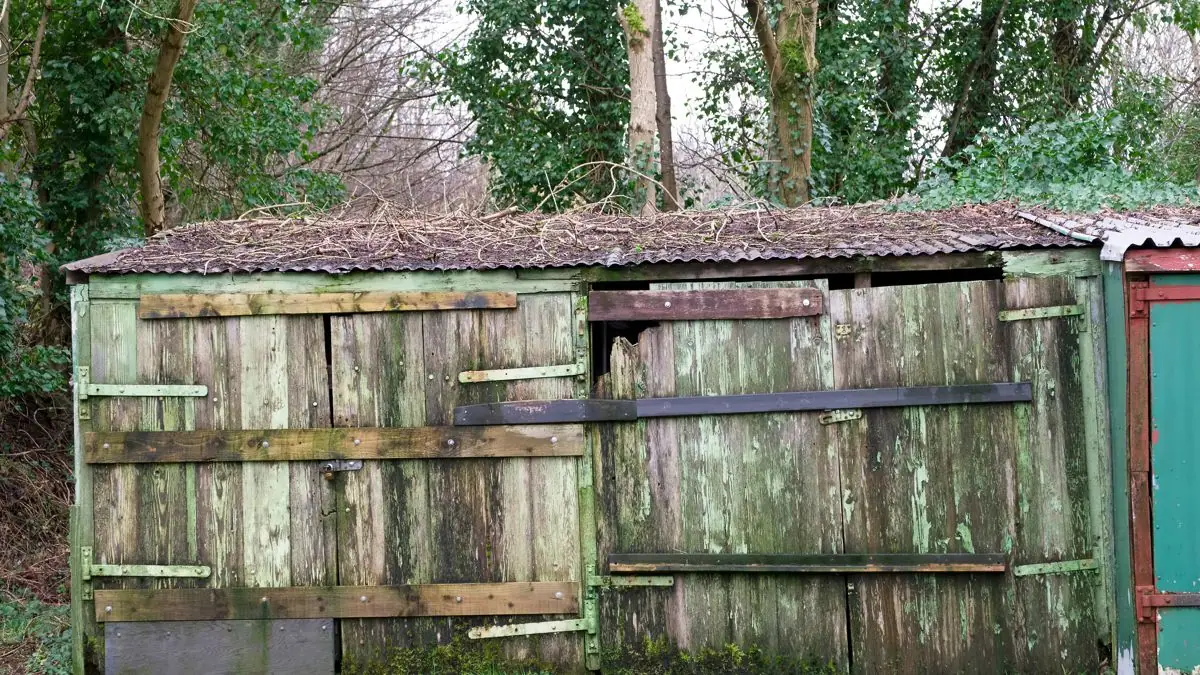
The door came off its top hinge two winters ago. The roof sags where the rain sits, one corner of the floor gives underfoot, and every spring the wasps move back in under the eaves. That old shed is no longer storing much besides rot, and it is sitting on the best corner of the yard.
Taking it down is a real project: prying, cutting and lifting, then a pile of debris bigger than the shed ever looked, which cannot just go to the curb. Planned well, it is a weekend. Rushed, it turns into an injury, a damaged fence or a month-long headache. This guide goes in the order the job should: safety checks, tools, how wood, metal and plastic sheds come apart, and your disposal options for the waste, including when to hand the whole job off.
Phase 1: Planning and Preparation
The safe part of shed removal happens before anyone picks up a hammer. Even a small shed is heavy, sharp and less stable than it looks once pieces start coming off.
Safety First: Essential Precautions and Gear
Wear all of this, all day:
- Steel-toed boots: for falling framing, dropped panels and the nails you will step on.
- Heavy-duty work gloves: leather or reinforced, against splinters, rusty screws and sharp metal edges.
- Safety glasses or goggles: every pry knocks loose dust, wood chips and debris.
- Dust mask or respirator: old sheds hold mold, mildew, animal droppings and years of dust.
- Hard hat: if the roof is tall or already unstable.
- Long sleeves and sturdy pants: against cuts, scrapes and irritation.
Then four checks, in this order:
- Utilities. A shed with lights or outlets has a live wire running to it. Turn off that breaker and confirm with a voltage tester that the wires are dead. Then have a licensed electrician disconnect the line before any demolition starts. We do not do electrical work, so on our jobs the electrician always comes first. Look for water or gas lines near or under the shed before you dig.
- Pests. Check the eaves, the corners and the floor for wasp and hornet nests, rodents and anything else living there. Deal with them before you start tearing things apart, not halfway through a wall.
- A partner. This is not a solo job. A second person steadies walls, lowers roof sections and gets help fast if something goes wrong.
- A clear zone. Move planters, patio furniture, toys and garden gnomes. Keep a perimeter of at least 10 feet around the shed.
Gathering the Right Tools
The shed material changes the list a little. This covers most jobs:
- Ladders: a sturdy step ladder, and possibly an extension ladder to reach the roof safely.
- Pry bars and crowbars: for prying apart wood panels, removing trim and pulling nails.
- Sledgehammer: for stubborn framing and for breaking up a concrete slab.
- Reciprocating saw (Sawzall) with demolition blades: the most valuable tool on the list. It cuts nails, screws, wood and metal.
- Drill/impact driver: for screws and bolts, especially on metal and plastic sheds.
- Hammer: a standard claw hammer for pulling nails.
- Wrenches and socket set: for the nuts and bolts on a metal frame.
- Shovel and mattock: for digging out posts or a foundation anchored in the ground.
- Wheelbarrow: for moving debris to your disposal pile.
Site Preparation
- Empty the shed. Every item comes out first. Sort as you go: keep, donate, throw away.
- Remove doors and windows. Unscrew the hinges and lift them out before the walls move, so no glass shatters into the pile.
- Pick the debris spot. Somewhere in the yard or driveway that a truck or dumpster can reach, out of the way of daily traffic.
Phase 2: The Demolition Process (Step-by-Step)
Take the shed apart in the reverse order it was built. It is slower than knocking it over, and far safer and more controlled. The method depends on what it is made of.
How to Dismantle a Wooden Shed
Wood sheds are the most common kind, and they are built like a miniature house: frame, siding, roof.
Step 1: Tear off the roof. Always work from the top down.
- Remove shingles: scrape and pry off the asphalt shingles or other roofing with a shovel or pitchfork. Let them fall inside or outside the shed.
- Pry up the sheathing: under the shingles is plywood or OSB. Lift the edges with a pry bar and peel it off the rafters.
- Cut the rafters (optional): if the roof frame will not come apart piece by piece, cut the rafters where they meet the walls with the reciprocating saw. Lower each section to the ground with your partner.
Roofing from a house is a different job: we do not do roofing tear-offs or haul loads of shingles. See construction debris: what we take.
Step 2: Take down the walls.
- Start with the siding: pry off the exterior panels.
- Separate the wall frames: the walls are 2×4 studs. Work one wall at a time. At a corner, knock the top plate of one wall free of the next with a sledgehammer.
- Use gravity: once a corner is loose, the whole wall section can usually be pushed over, into the shed or out into your clear zone. Everyone stands clear before anyone pushes.
- Break it down: on the ground, break each wall up with the sledgehammer or cut it into smaller, manageable pieces.
Step 3: Address the floor and foundation.
- Pry up the floorboards: the plywood or plank floor comes off the joists with a pry bar.
- Take apart the floor frame: pry the joists apart or cut them.
- Deal with the foundation: the shed sits on skids (large wooden beams), concrete blocks or a solid concrete slab.
- Skids/blocks: just move them out of the way.
- Concrete slab: leave it as a base for a patio, or break it up. Breaking a slab is hard work that takes a sledgehammer or a rented jackhammer.
How to Dismantle a Metal Shed
A metal shed is a set of panels bolted to a frame. Taking it apart is tedious more than difficult: expect hundreds of screws and bolts, and handle every panel with care, because the edges can be sharp.
- Doors and roof. Unbolt the door hinges and any sliding tracks. Remove the roof panel screws with a drill or socket wrench, starting at the peak and working down. Then unbolt the trusses and beams that form the roof.
- Wall panels. The slow part. Work around the shed removing every screw that holds the panels to the frame and to each other. Stack panels as they come off so they do not become a tripping hazard.
- The frame. What is left is a metal skeleton. Unbolt it with the drill or wrenches; it usually comes apart in vertical and horizontal sections.
- Anchors. Most metal sheds are bolted or staked to the ground or a slab. Remove those last to free the structure completely.
How to Dismantle a Plastic (Resin) Shed
The easiest of the three. Resin sheds are designed for homeowner assembly: interlocking panels, clips and very few screws.
- Consult the manual: if you still have it, follow the assembly steps in reverse.
- Start from the top: remove the screws or clips holding the roof panels.
- Pop the panels apart: with the retaining screws out, a pry bar or firm pressure separates the wall panels at the seams.
- Lift the walls out: the panels usually sit in a channel molded into the floor. Lift them free once they are apart.
- The floor: usually one large piece of molded plastic you can carry away once the walls are gone.
Phase 3: Debris Disposal Options
Now the shed is a pile on the ground: wood, metal, plastic, shingles and maybe broken concrete. There are four ways to make it disappear, and each one trades money against effort.
Option 1: DIY Hauling to a Landfill or Transfer Station
If you own a pickup or a large trailer, you can haul it yourself. The Sacramento Recycling and Transfer Station and Kiefer Landfill weigh your load and charge by the ton.
- Pros: the cheapest route if you already have the vehicle and will do the labor.
- Cons: you load heavy, dirty, sharp debris by hand, probably make several trips, and pay disposal fees each time.
Option 2: Renting a Roll-Off Dumpster
A dumpster is delivered to your property, you fill it, and it gets hauled away.
- Pros: good for a big job you want to work through at your own pace.
- Cons: all the lifting is still yours. Dumpsters are expensive, take up a lot of space and may need a city permit. You pay for the whole box even if the shed fills half of it.
Option 3: Recycling, Repurposing, and Donating
The greenest option, and the one with the most sorting.
- Wood: untreated wood works for DIY projects or firewood. Clean, nail-free wood may be accepted by a wood recycler and chipped into mulch. Pressure-treated or painted wood usually has to go to the landfill.
- Metal: panels and frames can go to a local scrap metal dealer, who will likely pay you for them. That offsets part of the project cost.
- Plastic: some resin sheds are recyclable. Ask your local recycling facility whether it takes large pieces of rigid plastic before you load anything.
- Donation: a shed still in usable condition can be offered free on a local marketplace, as long as whoever wants it comes and dismantles it.
Option 4: Hiring a Professional Junk Removal Service
This is the hands-off option, and the safest one: a crew takes the shed down, loads every piece and hauls it away, and nobody in your household is under a falling wall. The catch is timing.
We take sheds down and haul them away as one job, roofing included. Once a shed is a mixed pile of lumber, shingles and metal on the lawn, it counts as demolition debris. We do not take mixed demolition loads; a dumpster or a C&D hauler does. A pile of one material (metal only, concrete only or clean wood only) is worth a photo. So if you think you may want help, call or use our contact page before the first panel comes off, not after.
When to Hand the Shed to Take Care Junk
The satisfaction of taking a shed down fades fast once you are standing next to the pile. We do full-service shed removal and demolition across the greater Sacramento area. We take it apart in the order above, load every last piece and leave the yard clean. Each load goes to the right facility: metal to a scrap recycler, clean wood and other materials recycled when we can.
“Great experience using Serge to get rid of an old playhouse that was falling apart. By far the lowest quote, and he came the next day on time and was done before I knew he began.”
Davidseo25 S., YelpIf the shed is wired, book the electrician first. Then text a photo of the shed and what is inside to (916) 770-7619 for a free quote, and spend the weekend on something other than rusty nails.


